Creation of PlugIn terminal 5
Here are the steps to create an example plugin from Visual Studio:
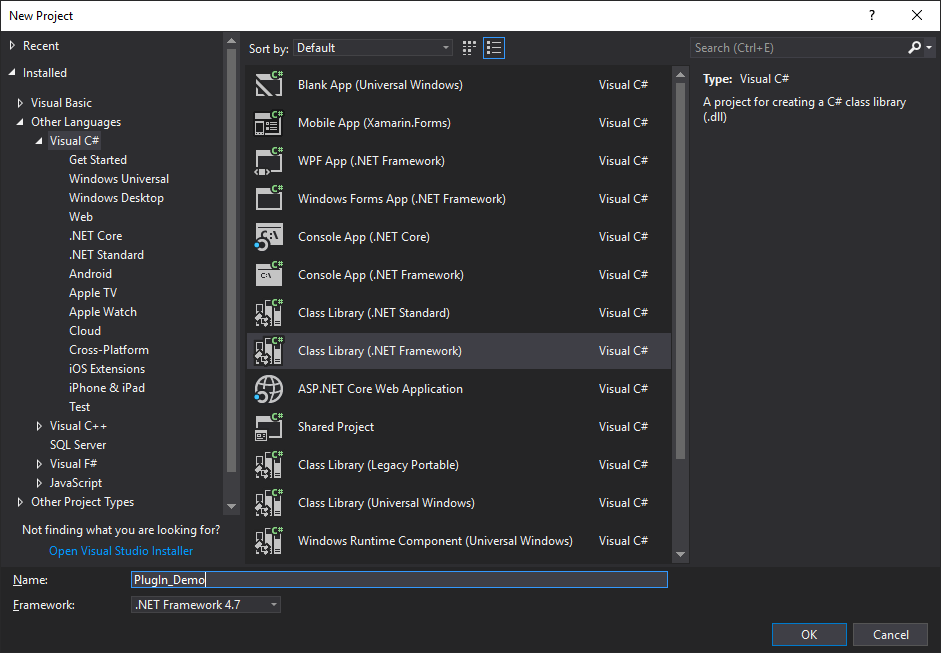
We will start Visual Studio and choose the menu option FILE / New project…
In the screen of New project we will select Class Library and indicate the name and the framework that we are going to use, version 4.7 should be selected.
Once the project is created we must add the references to the libraries Aliquo.Core.dll and Aliquo.Windows.dll, which can be found in the installation directory of Aliquo 5, "C:\Program Files (x86)\Aliquo Software 5" and System.ComponentModel.Composition that can be found in Assemblies. It is important that you mark not to make a local copy of these references.

Once the references have been added, you must implement the Command class, which is inside the namespace Aliquo.Windows.Extensibility.
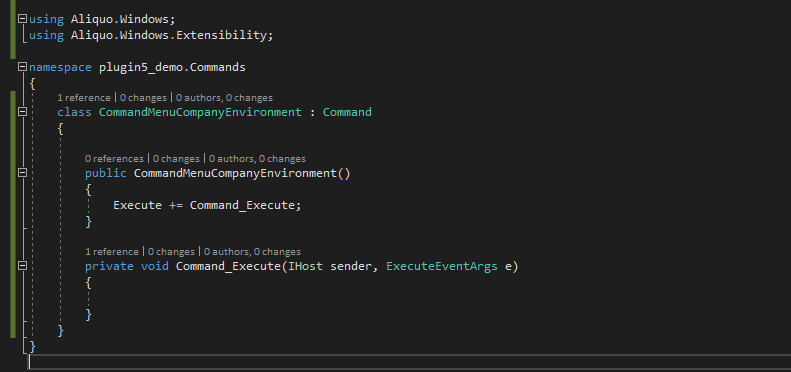
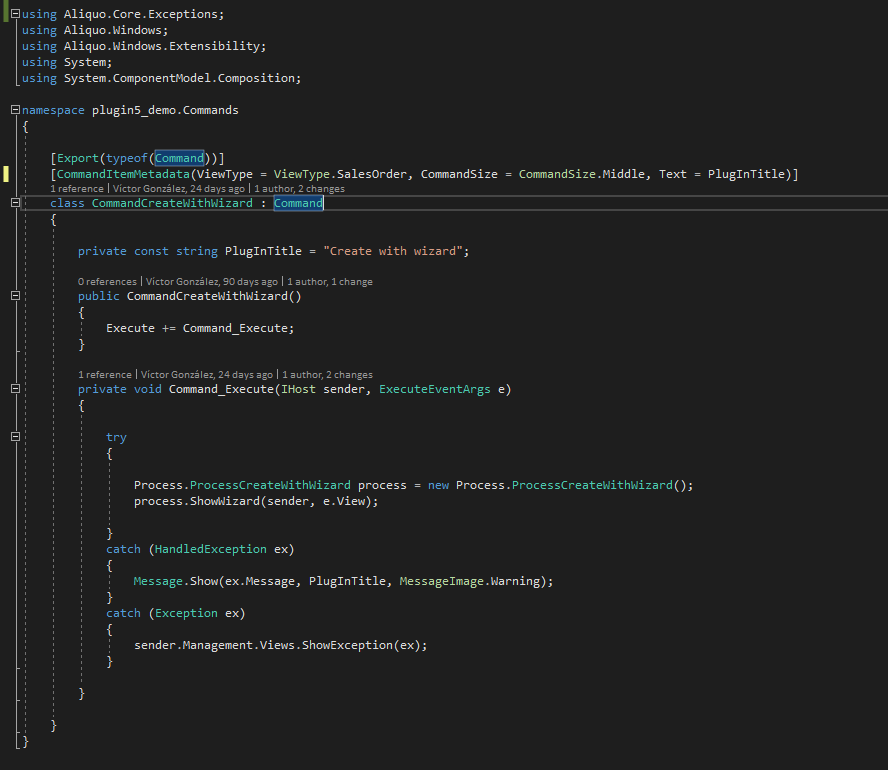
In addition to implementing the plugin interface to develop and give functionality to the plugin, we must also include the attributes and metadata that allow identifying the plugin type, so that Aliquo can recognize it.
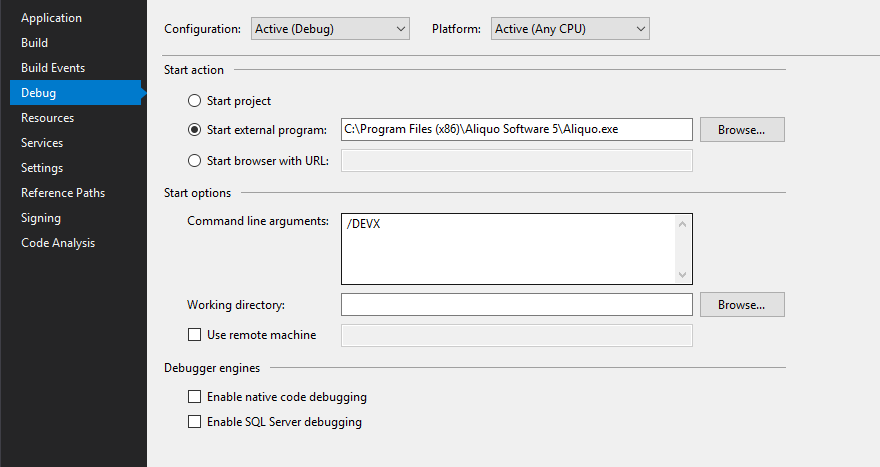
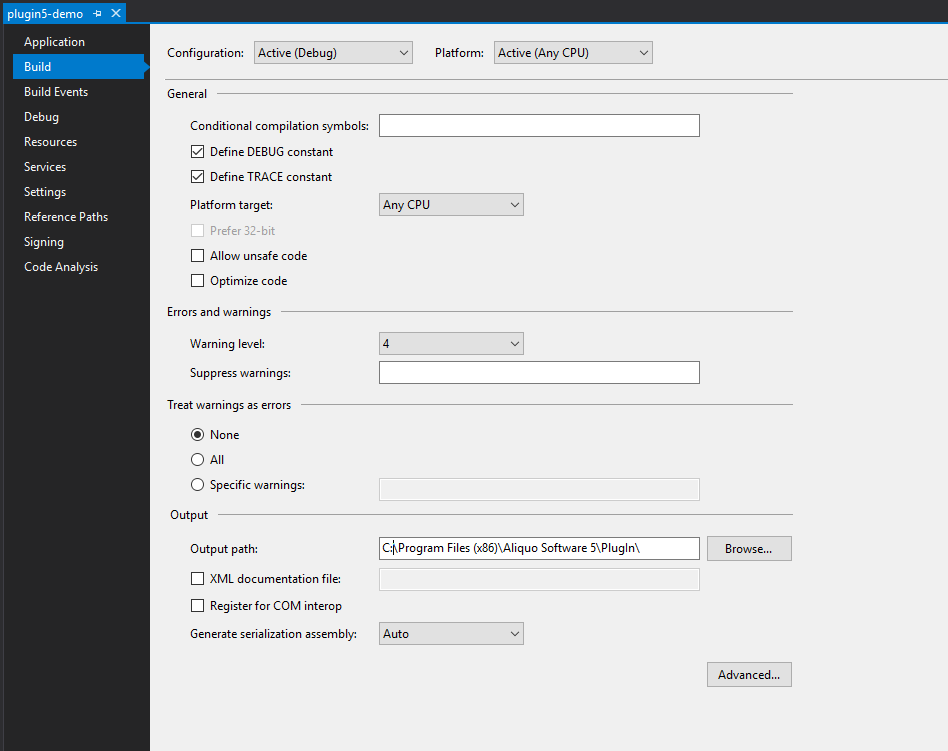
To start the debugging, you will specify, in the properties of the project, where the application and the compilation folder are located.
In the section Build we will choose as configuration option Debug, indicating the Output path "C:\Program Files (x86)\Aliquo Software 5\PlugIn\"
In the section Debug we will select the Start external program of Start action and indicate the complete path where Aliquo is installed (C:\Program Files (x86)\Aliquo Software 5\ Aliquo.exe) and in Start options the command line argument /DEV will be indicated, if you want to load the rest of the company’s PlugIn or /DEVX if you only want the execution of PlugIns hosted in the development folder.